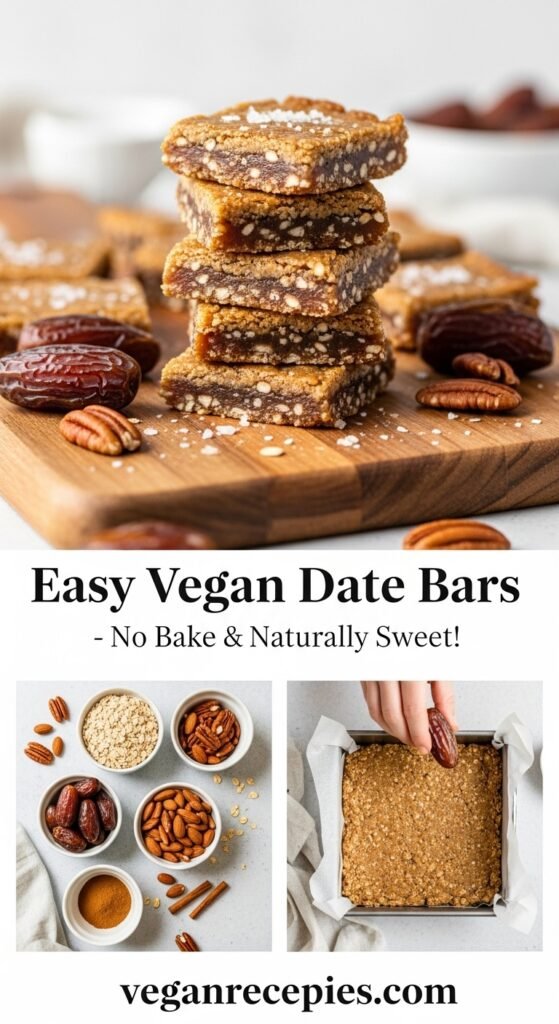
Easy Vegan Date Bars: A Healthy No-Bake Treat Ready in 20 Minutes
Introduction
If you’re searching for a naturally sweet, wholesome snack that satisfies your sweet tooth without any guilt, these vegan date bars are about to become your new obsession. These chewy, caramel-like bars are made with just a handful of simple ingredients, require absolutely no baking, and come together in about 20 minutes from start to finish. Whether you’re meal prepping healthy snacks for the week, need a quick energy boost before your workout, or want to impress guests with a gorgeous dessert that happens to be plant-based, these date bars deliver on every front.
What makes these vegan date bars so special is their incredible versatility and crowd-pleasing appeal. They’re naturally sweetened entirely by dates, which means no refined sugar, no artificial sweeteners, and no complicated ingredient lists. Kids devour them just as enthusiastically as adults, making them perfect for lunchbox treats, after-school snacks, or even a wholesome breakfast on the go. The texture is absolutely divine: a buttery oat crust topped with a luscious, sticky date layer that tastes remarkably like caramel. Every bite is chewy, nutty, and perfectly sweet.
These easy vegan date bars are ideal for so many occasions. Serve them at your next potluck and watch them disappear within minutes. Pack them in your hiking bag for sustained energy on the trail. Offer them as a healthier dessert option during the holidays when everyone’s looking for something sweet but not overly indulgent. They’re equally at home on a casual Tuesday afternoon as they are at a fancy brunch gathering.
History & Background
Date bars have a rich and fascinating history that spans cultures and centuries. Dates themselves are one of the oldest cultivated fruits in the world, with evidence of date palm cultivation dating back over 6,000 years in the Middle East, particularly in regions that are now Iraq and Iran. These naturally sweet fruits were prized by ancient civilizations not only for their delicious taste but also for their remarkable ability to provide sustained energy and nutrition in harsh desert climates.
The tradition of combining dates with oats and nuts into bar form gained significant popularity in North America during the early 20th century. Date bars, sometimes called matrimonial bars or matrimonial cake in Canada and certain regions of the United States, became a beloved staple at church potlucks, community gatherings, and family celebrations. The name “matrimonial bars” reportedly comes from the way the oat layers “marry” together with the sweet date filling, creating a harmonious union of flavors and textures.
These bars hold particular cultural significance in regions where dates grow abundantly, including California, Arizona, and throughout the Middle East. The Coachella Valley in California, famous for its date farms, helped popularize date-based desserts throughout the American Southwest during the mid-1900s. Today, vegan date bars represent a modern evolution of this classic recipe, adapting the traditional treat for contemporary dietary preferences while honoring the time-tested combination of ingredients that made date bars a beloved classic in the first place.
Why You’ll Love This Recipe
These homemade date bars are the kind of recipe you’ll find yourself making over and over again because they check every single box for what a great recipe should be.
The combination of simplicity, healthfulness, and absolutely irresistible taste makes these vegan date bars a winner in every household. You don’t need any fancy equipment, obscure ingredients, or advanced baking skills to achieve professional-looking results. The natural caramel flavor of the dates paired with the buttery, crumbly oat topping creates a flavor profile that rivals any bakery treat, yet you can feel genuinely good about eating them and serving them to your family.
Here’s why these easy date bars will become your go-to recipe:
- No baking required – Simply press into a pan and refrigerate, making them perfect for hot summer days or when you don’t want to heat up the kitchen
- Naturally sweetened – Dates provide all the sweetness you need without any refined sugar, corn syrup, or artificial sweeteners
- Budget-friendly – Made with pantry staples you probably already have on hand
- Allergy-friendly – Easily adaptable for gluten-free, nut-free, and soy-free diets
- Kid-approved – Children love the sweet, chewy texture and have no idea they’re eating something healthy
- Meal prep perfect – Make a batch on Sunday and enjoy wholesome snacks all week long
- Portable and packable – Ideal for lunchboxes, road trips, hiking, and on-the-go snacking
- Impressive presentation – They look absolutely stunning on a dessert platter despite being incredibly easy to make
Ingredient Notes
Understanding your ingredients helps you achieve the best possible results with these healthy date bars. Here’s everything you need to know about each component and how to customize the recipe to suit your pantry and preferences.
Medjool Dates: These are the star of the show and what gives these bars their incredible caramel-like sweetness and chewy texture. Medjool dates are larger, softer, and more naturally moist than Deglet Noor dates, making them ideal for this recipe. If your dates are on the drier side, simply soak them in warm water for 10-15 minutes before using, then drain thoroughly. You can substitute Deglet Noor dates in a pinch, but you may need to add a tablespoon or two of water to achieve the right consistency.
Rolled Oats: Old-fashioned rolled oats provide the perfect base for both the bottom crust and crumbly topping. They create a satisfying chewy-yet-crispy texture that contrasts beautifully with the soft date layer. For a gluten-free version, simply use certified gluten-free rolled oats. Avoid quick oats or steel-cut oats, as they’ll produce a different texture.
Coconut Oil: This plant-based fat binds the oat mixture together and contributes to the buttery mouthfeel of the finished bars. Use refined coconut oil if you prefer no coconut flavor, or virgin coconut oil if you enjoy that subtle tropical note. You can substitute vegan butter at a 1:1 ratio if coconut isn’t your thing.
Almond Flour: This adds richness, healthy fats, and helps create that melt-in-your-mouth texture in the crust. For a nut-free alternative, use sunflower seed flour or additional oats processed into a fine flour.
Maple Syrup: A small amount of pure maple syrup enhances the caramel notes and helps bind the oat mixture. You can substitute agave nectar or date syrup if preferred.
Vanilla Extract: This rounds out the flavors and adds warmth to the overall taste profile. Use pure vanilla extract for the best results.
Salt: Just a pinch of sea salt is essential for balancing the sweetness and making all the flavors pop. Don’t skip it!
Equipment Needed
One of the beautiful things about these no-bake date bars is that you don’t need any specialized equipment. Here’s what you’ll want to gather before you begin:
- Food processor (essential for processing the dates into a smooth paste)
- 8×8 inch or 9×9 inch square baking pan
- Parchment paper (makes removal and cutting so much easier)
- Medium mixing bowl
- Measuring cups and spoons
- Rubber spatula or wooden spoon
- Sharp knife for cutting the bars
- Optional: offset spatula for smoothing layers
📋 Recipe Card
Prep Time: 15 minutes
Cook Time: 0 minutes (no baking required)
Chill Time: 1-2 hours
Total Time: 1 hour 15 minutes to 2 hours 15 minutes
Yield: 16 bars
Category: Dessert, Snack
Method: No-Bake, Refrigerator
Cuisine: American
Diet: Vegan, Dairy-Free, Optionally Gluten-Free
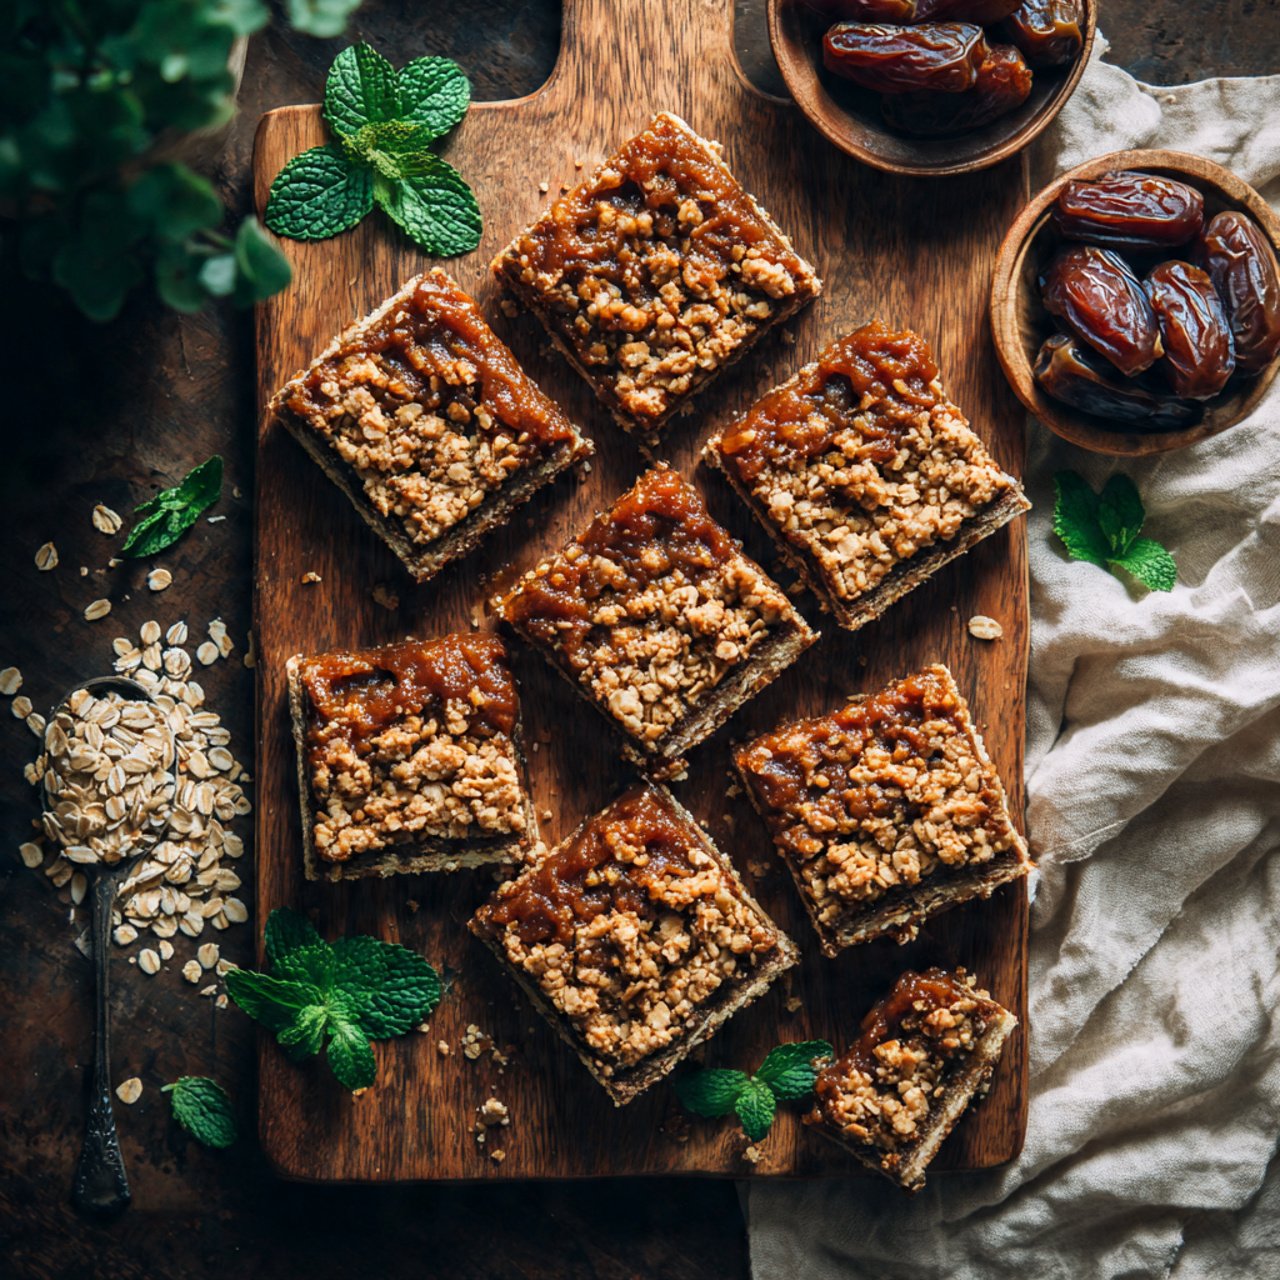
Description: These chewy, naturally sweetened vegan date bars feature a buttery oat crust and crumble topping with a luscious caramel-like date filling. Perfect for healthy snacking, meal prep, and satisfying your sweet tooth the wholesome way.
Ingredients
For the Oat Crust and Topping:
- 2 cups old-fashioned rolled oats (use certified gluten-free if needed)
- 1 cup almond flour
- ½ cup coconut oil, melted
- ¼ cup pure maple syrup
- 1 teaspoon vanilla extract
- ¼ teaspoon sea salt
For the Date Filling:
- 2 cups Medjool dates, pitted (approximately 20-24 dates)
- 3 tablespoons warm water
- 1 teaspoon vanilla extract
- ¼ teaspoon sea salt
- ½ teaspoon cinnamon (optional but recommended)
Instructions
Step 1: Prepare Your Pan
Line an 8×8 inch or 9×9 inch square baking pan with parchment paper, leaving some overhang on the sides for easy removal later. Lightly grease the parchment if desired, though this usually isn’t necessary.
Step 2: Make the Oat Mixture
In a large mixing bowl, combine the rolled oats, almond flour, and sea salt. Stir to combine. Add the melted coconut oil, maple syrup, and vanilla extract. Mix thoroughly until everything is well combined and the mixture holds together when pressed between your fingers. It should be slightly crumbly but cohesive.
Step 3: Create the Bottom Crust
Reserve approximately 1 cup of the oat mixture for the topping and set it aside. Transfer the remaining oat mixture to your prepared pan. Using your hands or the bottom of a measuring cup, press the mixture firmly and evenly into the bottom of the pan to create a compact crust. Make sure to press into the corners and edges for even coverage.
Step 4: Prepare the Date Filling
Add the pitted Medjool dates to your food processor along with the warm water, vanilla extract, sea salt, and cinnamon if using. Process on high for 2-3 minutes, stopping to scrape down the sides as needed, until you have a smooth, thick paste. The mixture should be sticky and spreadable, similar to the consistency of thick caramel or peanut butter.
Step 5: Add the Date Layer
Dollop the date paste evenly over the oat crust. Using a rubber spatula or offset spatula, carefully spread the date mixture into an even layer, covering the entire crust. Wetting your spatula slightly can help prevent sticking. Take your time with this step to ensure even distribution.
Step 6: Add the Crumble Topping
Take the reserved oat mixture and crumble it evenly over the date layer. Gently press down with your hands or the back of a spatula to help the topping adhere slightly to the date layer, but don’t compact it too much—you want it to remain somewhat crumbly for texture contrast.
Step 7: Chill Until Firm
Cover the pan with plastic wrap or a lid and refrigerate for at least 1-2 hours, or until the bars are completely firm. For faster results, you can place them in the freezer for 30-45 minutes.
Step 8: Cut and Serve
Once fully chilled and firm, use the parchment paper overhang to lift the entire slab out of the pan. Place on a cutting board and use a sharp knife to cut into 16 squares. For the cleanest cuts, wipe your knife clean between cuts.
Notes
- For best results, use soft, fresh Medjool dates. If your dates are dry, soak them in warm water for 15 minutes before processing.
- These bars are best stored in the refrigerator to maintain their shape and texture.
- The bars will become softer at room temperature, which some people prefer for a chewier texture.
- Feel free to add mix-ins like chocolate chips, shredded coconut, or chopped nuts to the date layer for variety.
- For a more pronounced caramel flavor, add 1 tablespoon of tahini to the date filling.
Nutrition Facts Table
Per serving (1 bar, based on 16 servings)
| Nutrient | Amount |
|---|---|
| Serving Size | 1 bar (approximately 55g) |
| Calories | 185 kcal |
| Total Fat | 9g |
| Saturated Fat | 5g |
| Unsaturated Fat | 3.5g |
| Trans Fat | 0g |
| Cholesterol | 0mg |
| Sodium | 45mg |
| Total Carbohydrates | 26g |
| Dietary Fiber | 3g |
| Total Sugars | 16g |
| Protein | 3g |
Note: Nutrition information is calculated using standard recipe databases and may vary based on specific ingredients used and portion sizes.
Tips & Variations
These versatile vegan date bars serve as a wonderful base recipe that you can customize in countless ways to suit your taste preferences and dietary needs.
Chocolate Lover’s Version: Fold ½ cup of dairy-free chocolate chips into the date paste before spreading, or drizzle melted dark chocolate over the finished bars for an extra-indulgent treat.
Tropical Twist: Add ½ cup of unsweetened shredded coconut to the oat mixture and include ¼ cup of dried mango or pineapple bits in the date layer for a taste of the tropics.
Nut Butter Swirl: Before chilling, drizzle 2-3 tablespoons of almond butter, peanut butter, or sunflower seed butter over the top and use a knife to create beautiful swirl patterns.
Extra Protein Boost: Mix 2 tablespoons of your favorite plant-based protein powder into the date filling for a more substantial snack that keeps you satisfied longer.
Spiced Version: Add warming spices like ½ teaspoon of cardamom, ¼ teaspoon of nutmeg, or a pinch of ground ginger to the date filling for a cozy autumn-inspired treat.
Seed-Studded Bars: Sprinkle hemp seeds, chia seeds, or pumpkin seeds over the top before chilling for added nutrition and crunch.
Citrus Zest: Add the zest of one orange or lemon to the oat mixture for a bright, refreshing flavor that pairs beautifully with the caramel-like dates.
Pro Chef Tips
Take your homemade date bars from good to absolutely exceptional with these professional-level insights that make all the difference.
Temperature matters for the coconut oil. Your melted coconut oil should be warm but not hot when you add it to the oat mixture. If it’s too hot, it can make the mixture greasy; if it’s solidified, it won’t incorporate properly. Aim for a liquid state at room temperature for the best results.
Don’t skip the salt. It might seem counterintuitive to add salt to a sweet recipe, but this small addition is what transforms these bars from one-dimensional sweet treats into complex, crave-worthy snacks. Salt enhances the natural caramel notes of the dates and makes the overall flavor profile more sophisticated.
Process your dates until completely smooth. The key to achieving that perfect caramel-like consistency is patience with your food processor. Most people stop too early, leaving small date chunks. Keep processing, scraping down the sides multiple times, until you have a perfectly smooth, spreadable paste.
Use the parchment paper lift technique. This simple trick makes removing and cutting your bars infinitely easier and ensures clean, professional-looking squares every time.
Chill thoroughly before cutting. Patience is a virtue here. If you try to cut your bars before they’re fully chilled, you’ll end up with a sticky mess and uneven pieces. The full 1-2 hours of refrigeration is worth the wait.
Common Mistakes to Avoid
Even simple recipes can go wrong if you’re not aware of potential pitfalls. Here’s how to ensure your vegan date bars turn out perfectly every time.
Using dry or old dates: This is the number one reason date bars fail. Old, dry dates won’t process into a smooth paste and will result in a crumbly, unpleasant filling. Always use fresh, soft Medjool dates, and if they seem dry, soak them first.
Not pressing the bottom crust firmly enough: A loosely packed bottom layer will crumble apart when you try to cut and serve the bars. Take time to really compact that base layer using firm, even pressure.
Adding too much water to the date paste: The filling should be thick and spreadable, not runny. Start with the recommended 3 tablespoons and only add more if absolutely necessary—a tablespoon at a time.
Cutting the bars while still warm: Room-temperature bars are soft and gooey, which makes cutting a messy endeavor. Always chill completely for clean, neat squares.
Skipping the parchment paper: Without parchment paper, removing the bars from the pan becomes extremely difficult, and you risk leaving half your treats stuck to the bottom.
Storage & Meal Prep
Proper storage ensures your healthy date bars stay fresh, delicious, and ready to enjoy all week long.
Refrigerator Storage: Store your vegan date bars in an airtight container in the refrigerator for up to 10 days. Layer parchment paper between the bars to prevent them from sticking together. The bars actually improve in flavor after a day or two as the flavors meld and develop.
Room Temperature: While these bars can be left at room temperature for a few hours (perfect for serving at parties), they will become quite soft and sticky. For best texture, serve them chilled or at cool room temperature.
Meal Prep Tips: These bars are ideal candidates for weekly meal prep. Make a double batch on Sunday and portion into individual servings for grab-and-go snacking throughout the week. They’re perfect for lunchboxes, gym bags, and office snack drawers.
Reheating: These bars are meant to be enjoyed cold or at room temperature, so no reheating is necessary. If they become too firm from refrigeration, simply let them sit at room temperature for 5-10 minutes before serving.
Make-Ahead & Freezer Notes
One of the best features of these no-bake date bars is how beautifully they freeze, making them perfect for batch cooking and long-term storage.
Freezing Instructions: These bars freeze exceptionally well for up to 3 months. To freeze, first chill the bars completely in the refrigerator until firm. Then cut into individual portions, wrap each bar individually in plastic wrap, and place in a freezer-safe bag or container. Remove as much air as possible to prevent freezer burn.
Thawing: To enjoy frozen bars, simply transfer them from the freezer to the refrigerator the night before you want to eat them. They’ll be perfectly thawed and ready to enjoy by morning. For quicker thawing, leave them at room temperature for 20-30 minutes.
Make-Ahead Tips: You can prepare the oat mixture and date paste separately up to 3 days in advance. Store them in separate airtight containers in the refrigerator, then assemble when ready. This is especially helpful when preparing for events or parties.
Best Reheating Method: No reheating required! These bars are designed to be enjoyed cold or at room temperature. The beauty of no-bake treats is that they’re ready to eat straight from the fridge.
Serving Suggestions
While these vegan date bars are absolutely perfect on their own, here are some delicious ways to elevate your serving presentation and create memorable snacking experiences.
As a Dessert: Serve a date bar alongside a scoop of dairy-free vanilla ice cream and a drizzle of caramel sauce for an elegant dessert that’s secretly healthy.
With Coffee or Tea: These bars pair beautifully with a warm cup of coffee, chai tea, or golden milk. The natural sweetness complements bitter and spiced beverages perfectly.
As Part of a Cheese Board: For a vegan cheese board, include date bars alongside dairy-free cheeses, fresh fruit, crackers, and nuts for a stunning spread.
Crumbled Over Yogurt: Break a date bar into pieces and use it as a topping for dairy-free yogurt bowls, adding both flavor and satisfying texture.
With Fresh Fruit: Serve date bars alongside fresh strawberries, apple slices, or orange segments for a balanced, nutrient-rich snack plate.
Post-Workout Fuel: Pair with a banana and a handful of almonds for a complete post-exercise recovery snack that provides carbohydrates, protein, and healthy fats.
FAQs Section
Can I make these date bars without a food processor?
While a food processor produces the smoothest results, you can use a high-powered blender in a pinch. You may need to add slightly more water and stop frequently to scrape down the sides. Alternatively, if your dates are very soft, you can mash them by hand with a fork, though the texture will be chunkier.
How do I know if my dates are fresh enough?
Fresh Medjool dates should be plump, glossy, and slightly sticky to the touch. They should give easily when pressed and have a rich, caramel-like aroma. Avoid dates that appear dried out, wrinkled, or have crystallized sugar on the surface.
Can I use a different type of date?
Yes, though Medjool dates produce the best results due to their natural softness and moisture content. Deglet Noor dates work but may require additional soaking time and a bit more water during processing. Avoid very dry date varieties.
Are these bars suitable for kids?
Absolutely! Children love these naturally sweet treats, and parents love that they’re made with wholesome ingredients. They’re perfect for school lunchboxes and after-school snacks. Just be mindful of any nut allergies if using almond flour.
Can I make these bars nut-free?
Yes! Simply substitute the almond flour with sunflower seed flour, additional oats processed into a fine flour, or even coconut flour (use half the amount if using coconut flour, as it absorbs more moisture).
Why are my bars falling apart?
The most common reasons are not pressing the bottom crust firmly enough, using dates that are too dry, or not chilling the bars long enough before cutting. Ensure you’re using fresh, soft dates and allowing adequate chilling time.
Can I add protein powder to these bars?
Yes! Add 2-3 tablespoons of unflavored or vanilla plant-based protein powder to the date mixture. You may need to add an extra tablespoon of water to maintain the right consistency.
Conclusion
These vegan date bars represent everything a homemade snack should be: simple to make, absolutely delicious, and genuinely nourishing for your body. With their buttery oat layers and caramel-like date filling, they prove that healthy eating doesn’t mean sacrificing flavor or satisfaction. Whether you’re new to plant-based baking or a seasoned pro, this recipe delivers consistent, crowd-pleasing results every single time.
I hope you’ll give these easy vegan date bars a try in your own kitchen. They’re perfect for meal prep, sharing with friends and family, or keeping all to yourself (no judgment here!). Once you experience how simple and rewarding it is to make your own wholesome snacks at home, you’ll never go back to store-bought options.
If you make these date bars, I’d love to hear how they turned out! Drop a comment below sharing your experience, any variations you tried, or questions you might have. And if you loved this recipe, please share it on Pinterest so other home cooks can discover this delicious treat too. Happy baking, friends!